🩺 Free Medical Tool
Walker Height Calculator for Seniors
Get your precise handle height instantly — based on the same wrist-to-floor formula used by physical therapists and clinicians worldwide.
Walker Height Calculator
Enter your details for an instant, clinician-approved result
Walker Height Calculator for Seniors
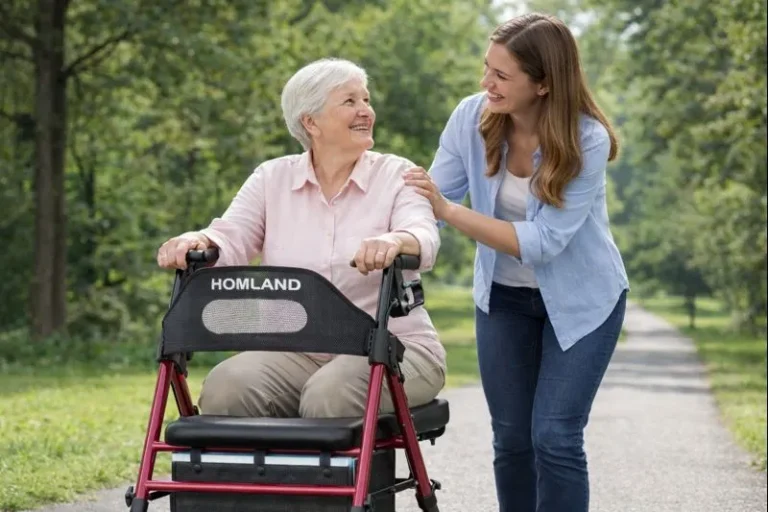
Finding the right walker height is not just about comfort — it is about preventing long-term damage to your body. Many seniors and caregivers overlook the importance of a precise wrist-to-floor measurement, assuming any frame will do. That assumption leads to unnecessary pain.
A properly fitted rollator or standard walking stick keeps your posture aligned and reduces fatigue significantly over time. When handles sit at the wrong level, users begin gripping awkwardly, placing stress on their joints with every step. The body absorbs that misalignment silently until pain becomes unavoidable.
Healthcare professionals and therapists consistently emphasize that an online calculator or medically-approved formula should serve as a starting point — not the final word. A clinician can assess mobility limitations caused by injury or surgery that a digital tool simply cannot detect on its own.
What many people do not realize is that height adjustable designs exist precisely because user size alone does not determine optimal height. Arm proportion, walking style, and even shoulders alignment all influence the correct height needed for safe fit and ease of use.
The difference between independence and a fall often comes down to millimeters. Using professional guides, product instructions, or measurement methods alongside an invaluable tool like a cane length calculator gives older adults and individuals with mobility challenges the stability and support they deserve to move naturally, comfortably, and safely.
How to Measure the Correct Walker Height
Step 1
Before anything else, gather a reliable tape measure and wear the shoes you use most during daily movement. The overall height of your body changes meaningfully depending on footwear, so measuring while barefoot will give you an inaccurate handle height baseline for your rollator or walker.
Step 2
Put on your sneakers or wearing shoes before taking any measurement. Footwear thickness directly affects your recorded standing height, which feeds into every subsequent calculation. Skipping this step is one of the most common reasons people end up with a poorly fitted device from the very beginning.
Step 3
Let your arm hang naturally at your side and locate the wrist crease — the horizontal line where your hand meets your forearm. Measure the distance from that point to the floor. Your walker or rollator grips should align with this mark, allowing your elbow to maintain a 15 to 20 degree angle during use, with your palm resting comfortably over the handles. This is your ideal length and the foundation of accurate measurement.
Final Tip
Most rollators and walkers are height adjustable within a set range. If your actual measurement falls between settings, start one inch higher rather than one inch lower, then adjust height during a short walk to find what feels most natural for your gait.
Grip Height Measurement
According to many physiotherapists and rollator manufacturers, the most reliable method is to stand upright with your back straight and arms hanging loosely at your sides while wearing your shoes. The recommended grip height is determined by measuring the vertical distance from the floor to your wrist bone, with your elbow slightly bent — this ensures a naturally upright position during use.
Walker Height Test
To perform the walker height test, have the senior stand straight with arms at sides next to the walker frame. The walker handle should align with the wrist when arms hang relaxed. If the handle forces the palm and fingers upward or downward, it is too high or too low and must be adjusted. A quick method when shopping involves dividing height by 2 as a rough indication of handle positioning, though this is never a substitute for a physical check with forearm level alignment confirmed.
How to Set Proper Walker Height
Locate the adjustment mechanism on the walker legs — typically a spring button or sliding legs system. Align the handles so they meet the crease of wrist when standing naturally. Avoid settings where arms too straight or arms too bent positions occur, as both create risk of falling. Ensure all four legs are locked at the same height after adjustment and always customize based on personal needs before performing a test walk.
Measure Wrist Height
Put on your everyday walking shoes and let your arms hanging naturally at your sides. Measure from the ground up to the crease of your wrist — this measurement becomes the target for your walker handle or handlebars height. Your elbows should achieve a natural 15° to 30° bend during walking. If you find yourself bending over or shrugging shoulders, the handle is not set at the correct handle level, and the measurement needs revisiting.
Handle Height
Handle height should always be assessed while wearing regular shoes. Stand with arms at side and confirm your elbows have slightly bent elbows when gripping the rollator or walker at the center of wrist level. If you are taller or shorter than average, the adjustment range of your device matters significantly — not all models accommodate the full floor-to-wrist span equally.
Seat to Floor Height
The seat-to-floor measurement is critical for rollator users who also need a resting option. Sit naturally and locate the knee crease — the fold behind your knee. The seat-to-floor height should match this distance while wearing everyday shoes, keeping your feet flat without dangling and ensuring comfortable weight distribution.
Step-by-Step Guide for Measuring Walker Height
Put on your walking shoes
Stand in a relaxed posture with arms relaxed at your sides. Never measure barefoot — shoe thickness affects the final setting.
Find the wrist crease distance from the floor
This is your target for walker handles. Use a tape measure for accuracy — even a centimeter matters.
Use adjustment knobs or push-button mechanism
Align handles to your measured height. Your elbows should rest at a 15° to 30° angle when gripping.
Stand upright, measure once more, confirm your grip
Take a short test walk before daily use to verify the setting feels natural under real movement conditions.
Common Mistakes When Measuring
| Mistake | Why It Matters |
|---|---|
| Measuring barefoot | Changes effective height by 1–2 cm vs wearing shoes |
| Standing stiff or slouching | Distorts natural arm hang; throws off elbow angle reading |
| Ignoring the adjustment range | Locks users into wrong positioning even after measuring correctly |
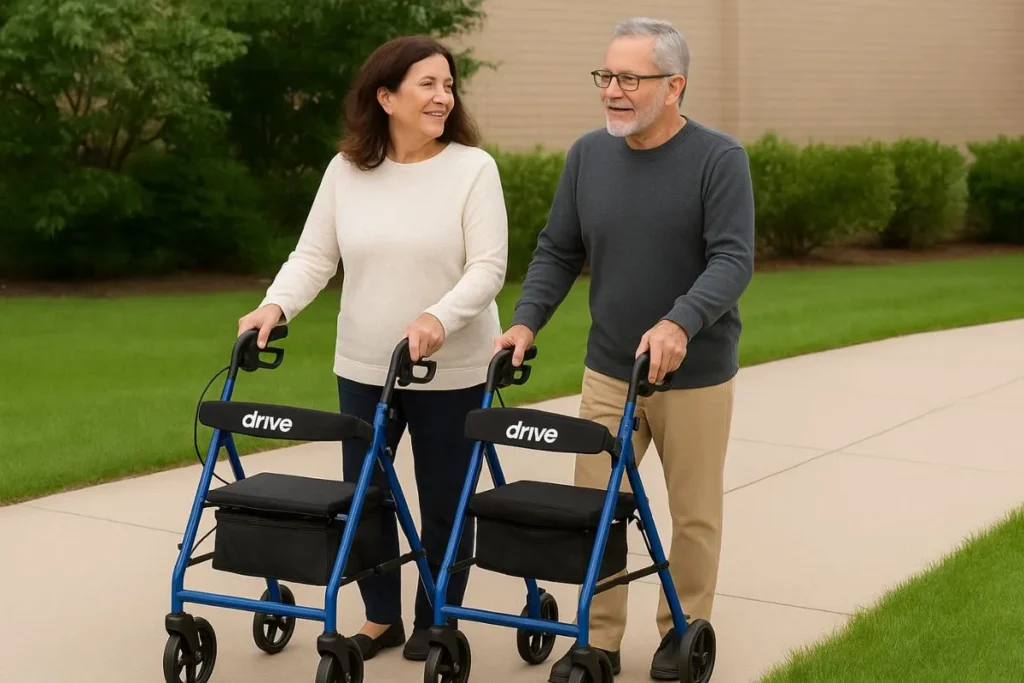
Why Walker / Rollator Height Matters
Finding the right walker height is not just about comfort — it is about preventing long-term damage to your body. Many seniors and caregivers overlook the importance of a precise wrist-to-floor measurement, assuming any frame will do. That assumption leads to unnecessary pain.
A properly fitted rollator or standard walking stick keeps your posture aligned and reduces fatigue significantly over time. When handles sit at the wrong level, users begin gripping awkwardly, placing stress on their joints with every step. The body absorbs that misalignment silently until pain becomes unavoidable.
Healthcare professionals and therapists consistently emphasize that an online calculator or medically-approved formula should serve as a starting point — not the final word. A clinician can assess mobility limitations caused by injury or surgery that a digital tool simply cannot detect on its own.
What many people do not realize is that height adjustable designs exist precisely because user size alone does not determine optimal height. Arm proportion, walking style, and even shoulders alignment all influence the correct height needed for safe fit and ease of use.
The difference between independence and a fall often comes down to millimeters. Using professional guides, product instructions, or measurement methods alongside an invaluable tool like a cane length calculator gives older adults and individuals with mobility challenges the stability and support they deserve to move naturally, comfortably, and safely.
With the Grips at Wrist Height
When grips are set precisely at wrist height, your body achieves something most people take for granted — upright body posture without conscious effort. The handgrips allow you to distribute body weight evenly, preventing undue pressure on any single joint. Your shoulders stay level, and the device supports stability without forcing compensatory movements.
Pushing vertically downwards through properly positioned grips activates the natural load-bearing chain through the arms and spine. This matters especially on downhill paths and loose ground, where brake performance and weight distribution become critical. Misaligned tires and poor braking response are often blamed on the device — but the root cause is frequently a grip height that forces the body into an unnatural angle, reducing directional stability.
Why Walker Height Matters
Walker height is the single most influential factor in determining whether mobility aids improve or worsen a user's condition. Incorrect settings create tension across the shoulders, neck, and upper back within days. Users begin to bend forward unconsciously, developing poor posture habits that outlast the original mobility issue.
Proper wrist height alignment keeps the spine straight and shoulders relaxed with elbows bent at the optimal 15° to 30° range. This positioning supports smoother motion, reduces joint strain, and dramatically cuts down on back pain and fatigue over extended use. The handles should meet the wrist crease consistently, allowing arms and joints to work with the body's natural mechanics rather than against them.
Safety, comfort, efficiency, balance, and confidence all trace back to one measurement. When adjustments are made correctly and reviewed regularly, the walker becomes a genuine extension of the user's body rather than an obstacle to natural movement.
What Happens If the Walker Is Too High or Too Low?
Are the Rollator Grips Set Too High or Too Low?
Handles too high force the user to raise their shoulders and neck into a rigid, elevated position. Over time, this causes neck pain and reduces walking support effectiveness. The grips become a source of stress rather than stability.
Handles too low create the opposite problem — a bent over hunched position that strains the back. This incorrect posture is particularly damaging during long-time usage, building severe pain in the neck, shoulders, and back.
- Wrist pain or shoulder pain after short walks — indicates handles too high or handles too low
- Shoulders upward or hunching while walking — signals improper upper body alignment
- Uneven pressure across arms — suggests height misaligned settings
- Feeling tired or sore faster than usual — points to poor walking rhythm
- Leaning forward or stretching to reach handles — confirms immediate need for height adjustment
- Loss of steady balance or inability to maintain a straight path — serious sign requiring professional reassessment
- Tension in the upper body building progressively — reliable indicator settings are working against balanced movement
| Sign | What It Indicates | Action |
|---|---|---|
| Wrist or shoulder pain | Handles too high or too low | Re-measure and readjust immediately |
| Shoulders raised while walking | Handles too high | Lower handles by 1–2 notches |
| Hunching forward | Handles too low | Raise handles to wrist crease level |
| Fatigue faster than usual | Height misaligned | Verify elbow angle during test walk |
| Leaning forward to reach grips | Handles too far or too low | Consult a rehabilitation therapist |
| Loss of steady balance | Serious misalignment | Seek professional assessment |
Walker / Rollator Size Categories & Height Ranges
Size Categories
| Category | User Height | Weight Capacity | Handle Width Range |
|---|---|---|---|
| Junior | 4'8" – 5'2" | Standard | 24 inches – 29 inches wide |
| Standard | 5'3" – 5'11" | Standard | 32 inches – 40 inches |
| Tall | Over 6'4" | Standard | Extended range |
| Bariatric | Any height | 300lbs – 700lbs | 32 inches – 40 inches |
Walkers come in standard widths designed to keep users stable and safe across different body types. Choosing the correct adjustable height category from the start prevents purchasing a device outside your height and weight-based needs. A narrower rollator or standard-type walker suits most home environments, while categories like Bariatric serve users with higher support demands.
Height Fit Range Reference
| Size | Height (Imperial) | Height (Metric) | Weight Limit |
|---|---|---|---|
| Junior | 4'8" – 5'2" | 1.42m – 1.57m | 250 pounds / 113.4kg |
| Standard | 5'3" – 5'11" | 1.6m – 1.8m | 300 pounds / 136.1kg |
| Tall | Up to 6'4" | Up to 1.93m | 300 pounds / 136.1kg |
| Bariatric | Any height | Any height | 700 pounds / 317.5kg |
Understanding rollator sizes across both metric and imperial systems is essential for international buyers. The 160cm to 180cm Standard range covers the majority of users, while 142cm to 157cm suits the Junior bracket. Users approaching 1.93m or beyond need Tall or custom configurations.
What to Look For When Adjusting a Walker
Once you have set and tightened the adjusted height, perform a brief walk to confirm nothing is slipping. If any instability appears, readjust immediately. A correctly locked height should feel seamless — no wobbling, no shifting mid-stride.
Place the walker on a flat surface — never test on a bumpy or sloped area. All legs must sit at the same height simultaneously. On an uneven surface, lowering one side becomes a safety hazard immediately. The frame must stand straight and even before any walking begins.
With elbows slightly bent and shoulders relaxed, walking should feel comfy from the first few steps. Over the following days, check in with how your body responds — comfort confirmed on day one does not always hold as muscles adapt to new movement patterns.
Avoid positions where arms too straight or arms too bent configurations occur — both undermine walker stability. Confirm all four legs are locked at the same height before trusting the device for full weight-bearing support during daily use.
Lock all buttons before performing a test walk. Stand with back straight and assess whether any muscle tension develops within the first few minutes. Cross-check your measurement results against the device's critical value settings and confirm the fit falls within the appropriate size range.
- 1 Lock all buttons on both sides before standing up with the walker
- 2 Stand with back straight and take 5–10 steps to assess muscle tension
- 3 Cross-check measurement results against the device's critical value markings
- 4 Confirm fit falls within the appropriate size range for your height category
The Cane / Walking Stick Formula
The standard formula for cane length used by physical therapists, occupational therapists, and medical professionals globally
Internationally RecognizedThe optimal elbow angle when holding cane at correct 50% of your height — provides maximum support with natural body alignment
Clinically ProvenThe 50% rule is the most widely referenced method among physical therapists, occupational therapists, and medical professionals globally. By taking 50% of your height, you arrive at an internationally recognized formula for cane length that promotes comfortable walking with natural body alignment.
The formula targets an elbow bend of 15 degrees to 20 degrees, keeping the bent arm in a position that offers maximum support without forcing the shoulders, back, or wrists into compensatory angles. When the holding cane position feels effortless, the length is correct.
Posture, stability, and mobility assistance all improve measurably when cane length is derived from this standard formula rather than guesswork. Many users who experience recurring falls discover their cane was simply the wrong length — not that their balance had deteriorated.
A calculator built on the 50% rule removes the guesswork entirely. Physical therapists and occupational therapists recommend this approach as a starting point before fine-tuning based on individual elbow bend preferences and specific walking patterns unique to each user.
How to Use This Calculator Result
Once the calculator provides a suggested height, do not treat it as absolute. Begin with the wrist crease measurement as your anchor and make a short short walk test to validate the output. Your elbows slightly bent at 15° to 20° during movement confirms the result is working correctly for your body.
Watch for signs of shrugging or stooping — both indicate the handles need further adjustment. If your rollator has brakes or a fold mechanism, verify these still operate correctly at the new height setting. For users with back, shoulder, or balance concerns, treat the calculator result as a starting reference and follow up with professional advice.
- ✅ Elbows slightly bent at 15°–20° — result is correct
- ❌ Shrugging shoulders — handles are too high, lower by 0.5"
- ❌ Stooping forward — handles are too low, raise by 0.5"
- ⚠️ Brakes or fold mechanism — check these still work at new height
- ⚠️ Back or shoulder tension — consult professional advice
Always Confirm Both Sides Equally
After any adjustment, confirm both sides equally are locked before walking. An uneven lock — where one leg is set slightly higher than the other — is one of the most common causes of instability after a height change. Check each leg individually before putting full weight on the walker.
Who Should Not Use a Rollator Walker?
Not Suitable for Everyone
A rollator is not suitable for users with significant balance issues or profound weakness in standing. The wheeled design moves too freely underfoot for these individuals, increasing instability rather than reducing it.
- Cannot maintain standing independently for a few seconds
- Have significant balance issues that are uncontrolled
- Experience profound weakness in legs or core
- Cannot safely operate brakes due to hand weakness
- Need a fully stable fixed anchor for every step
- Provides a fixed stable base that does not roll
- Requires user to lift and place the frame each step
- Safer anchor for users with limited stability
- No brakes or rolling parts to manage
- Better for immediate post-surgery or post-injury recovery
The fundamental difference is control — a standard walker frame requires the user to lift and stand up using the frame as a fixed anchor, while a rollator demands a baseline of controlled stability to stand up safely. If a person cannot maintain a stable upright stance independently even for a few seconds, rollator use carries real risk.
How to Use a Walker Correctly
When rising from a chair, position the walker directly in front before attempting to stand. Place both hands on the handles and use your weaker leg to initiate the push upward into standing position. Never use the walker itself to pull — always grasp firmly and push through your arms as your legs engage.
Move the walker frame forward first, then step your back legs — or weaker leg — into the inside frame space. Keep your eyes level and look up rather than down at the ground. Move your legs in a controlled rhythm and avoid letting either foot travel beyond the inside frame boundary during each stride.
Never pivot sharply. Turns slowly using small, deliberate feet movements. Keep your walker stationary, move your legs in an arc around it, and maintain balance throughout. Never lift the walker while mid-air turning — this creates momentary instability that frequently leads to falls.
| Hazard | Risk Level | Recommendation |
|---|---|---|
| 🪜 Stairs | High Risk | Use handrails only — walkers are never designed for stair use |
| 🪣 Loose rugs | High Risk | Remove or secure all loose rugs — major fall hazards |
| 💧 Wet surfaces | High Risk | Avoid completely — rubber tips lose grip on moisture |
| 🪟 Smooth surfaces | Medium Risk | Inspect walker legs regularly for worn rubber tips |
| 👟 Footwear | Prevention | Always wear supportive shoes and comfortable shoes — never use a walker in socks |
Factors Affecting Walker Height
User's Height and Arm Length
Height and arm length together determine the true grip requirement — yet most people only account for one. Taller individuals with proportionally shorter arms may need adjustable legs set lower than their height alone suggests. Conversely, users with longer arms may find standard measurements inadequate, requiring tall walker models to reach a natural wrist-level grip.
Shorter users and those needing petite versions face the opposite challenge — devices with a reduced handle range that cannot descend low enough. Always verify the full adjustment span of any walker before purchasing.
May need adjustable legs set lower than height suggests if they have shorter arms. Consider tall walker models for extended handle range.
Standard measurements may be inadequate. Users with longer arms often need a higher handle setting than their height formula suggests.
Devices with a reduced handle range may not descend low enough. Always check minimum height of petite versions before purchasing.
Always verify the full adjustable legs span of any walker — never assume standard sizing covers your specific height-to-arm ratio.
Type of Walker
| Walker Type | Key Features | Height Considerations |
|---|---|---|
| 🚶 Standard Walker | No wheels, must be lifted each step | Set to exact wrist crease — demands precise alignment |
| 🛞 Two-Wheeled Walker | Front wheels, back legs stationary | Slightly lower height for controlled push motion |
| 🪑 Rollator / Four-Wheeled | Wheels, brakes, optional seat | Relaxed arms position — accounts for seated and walking use |
Each walker type interacts differently with height adjustment settings. A smoother motion rollator allows slightly more postural flexibility, while a no-wheel Standard Walker demands precise wrist-level alignment because every step involves a full lifted reset of the frame.
Individual Mobility Needs
Beyond Standard Formulas
Users dealing with arthritis, post-surgery limitations, or muscle weakness require fine-tuned adjustments that go beyond standard formulas. A physical therapist can prescribe ergonomic walker settings tailored to the user's specific mobility range and upper-body strength, accounting for asymmetries that calculators and general guides simply cannot capture.
When to Adjust or Replace Your Walker
How Often to Check Walker Height
| Trigger | Action | Priority |
|---|---|---|
| Every 3 months / 6 months | Perform regular reviews of walker fit | 🔵 Routine |
| Weight loss or weight gain | Reassess height immediately | 🟠 Urgent |
| After surgery or injury | Check range of motion and muscle strength changes | 🔴 Critical |
| Change in walking style | Re-evaluate natural stance and posture correction needs | 🟠 Urgent |
| During rehabilitation | Work with therapist to monitor posture changes | 🔴 Critical |
Signs You Need a Replacement
- Frame instability — device wobbles or bends under normal load
- Worn-out grips or cracked handles that compromise control
- Rubber tips on legs have completely lost traction
- Height adjustment range fails to extend or lock properly
Modern Walker Upgrades
- Lightweight aluminum or carbon-fiber frames for easier lifting and better maneuverability
- Extended handle adjustment range serving users of varying heights
- Ergonomic hand grips that reduce wrist strain during long walks
- Improved control mechanisms substantially safer than older fixed-height designs
The Health Benefits of Correct Walker Height
Reduces Joint & Muscle Strain
Correct walker height allows arms and legs to move in balanced motion without forcing joints into stress positions. When the handle level aligns with the body's natural mechanics, body weight distributes evenly across shoulders, wrists, and lower back — eliminating the repetitive strain injuries that develop quietly over months of incorrect use. Greater endurance on walks and improved participation in rehabilitation exercises follow naturally.
Increases Mobility & Comfort
A correctly set walker height allows elbows to bend naturally, generating the leverage needed for effortless forward motion. Walking becomes less of a managed effort and more of a natural rhythm. Over time, preserved leg strength and improved balance reduce dependency on the device itself — a sign that the walker is doing its job rather than creating illness-inducing compensation patterns through improper operation.
Improves Overall Health & Safety
An adjusted walker transforms daily movement into a genuinely health-promoting activity. Correct posture during walking opens the chest cavity, improving breathing and circulation by allowing the lungs to expand fully. Standing upright with arms in proper position reduces risk of falls, supports steady movement, and builds the confidence that seniors need to maintain independence without fear of injury.
Long-Term Compounding Benefits
Long-term safety, comfort, and balance compound into meaningful improvements in overall wellbeing. Every correctly adjusted walk builds on the last — protecting joints, strengthening muscles, and reinforcing the confidence that seniors need to maintain independence for years to come.
Seat Height Adjustment
- 1Stand with your back against wall — keep your head level and posture natural
- 2Measure from the floor to the crease behind your knee — this is the knee fossa
- 3This measurement taken from the ground up gives your target seat height reference
- 4Adjust the rollator seat to match — confirm feet flat on ground when seated
Seat Height Reference
| Measurement | Standard Range | What to Check |
|---|---|---|
| Seat height from floor | 13 inches – 18 inches | Matches your knee fossa measurement |
| Inside seat width | 13 inches – 18 inches wide | Hips fit with 2–3cm clearance each side |
| Seat depth | Varies by model | Backside fully supported, no pressure behind knees |
| Feet position | Feet flat on ground | No dangling — confirms correct seat height |
The rollator seat dimensions across most standard rollator seats fall within this range. When seated on a flat surface, your feet flat on ground position confirms correct fit. If the backside feels unsupported or feet dangle, the seat height needs revision. Use this table as a reference when comparing comfortable seating options across different rollator models.
Considerations for Width and Load-Bearing Capacity
- Measure your hips at their widest point while seated
- Add 2.5cm to 5cm clearance on each side for the ideal seat width
- Standard width seats measure 33cm to 46cm — covers 13 inches to 18 inches
- Overweight users should always consider a widened version for comfort and structural safety
- Confirm seat does not compress hips when sitting — discomfort means too narrow
- 1 Measure the narrowest spaces in your home — especially all doors and passages
- 2 Check the folded width of the rollator — most standard models fit through standard door width
- 3 For tight spaces, look for half-fold passage designs that compress further
- 4 Always confirm folded width against your narrowest passages before purchasing
Weight Capacity Reference
| Category | Capacity (lbs) | Capacity (kg) | Who It Suits |
|---|---|---|---|
| Standard | 250 pounds – 300 pounds | 113kg – 136kg | Most average-weight users |
| Bariatric | Up to 500 pounds | Up to 227kg | Overweight users beyond standard capacity |
Overweight users must verify weight capacity before purchase — exceeding it compromises frame stability and creates genuine safety risks. The Bariatric category exists specifically to serve users beyond standard capacity thresholds without sacrificing structural integrity.
Special Requirements and Verification Procedures
- Prioritize large wheels — typically 20cm diameter for terrain adaptation
- Larger wheels handle outdoor use surfaces with far greater stability
- Check braking system is reliable on slopes and uneven ground
- Frame should be lightweight aluminum for easy maneuverability
- Confirm rubber tips or wheels suit the terrain you walk most
- Small wheels offer tighter turning in confined spaces
- Lower braking system response threshold benefits users with weak hands
- Narrower frame navigates doors and passages more easily
- Check compatibility with narrowest spaces in your home
- Lighter models reduce fatigue during frequent indoor movement
Ergonomic Curved Handlebars
Ergonomic curved handlebars reduce wrist fatigue significantly and are worth prioritizing for users who walk for extended periods. Unlike standard straight grips, curved designs align naturally with the wrist's resting angle — reducing the micro-strain that builds up silently over hundreds of daily steps. Users with weak hands or arthritis benefit most from this upgrade.
- 1Lock all buttons on both sides — confirm each leg is fully secured before standing
- 2Place walker on a flat surface and confirm all legs sit evenly with no wobble
- 3Perform a test walk on a familiar surface before venturing onto new terrain
- 4Stand with back straight and confirm no muscle tension develops within first few steps
- 5Verify braking system responds correctly — test brakes before going downhill
- 6Confirm elbows slightly bent at 15°–30° — the core signal that height is correct
- 7Any adjusting done post-measurement must be followed by this final verification sequence without exception
Test-Drive the Rollator
Never Skip the Test-Drive
Once the rollator device is configured, take it for a proper walk in a controlled environment before committing to purchasing. Check that the handles feel correctly positioned, the seat is accessible when needed, and the overall experience confirms you can move safely and comfortably.
Purchasing a rollator without this step risks discovering fit issues only after the return window has closed. The test-drive is the final confirmation that the device genuinely meets your needs — not just on paper, but in actual right size movement.
- Handles feel correctly positioned at wrist crease level
- Elbows bend naturally at 15°–30° during walking
- Seat is accessible and at correct knee fossa height
- Brakes respond immediately when engaged
- Walk feels safely and comfortably controlled
- No shrugging or stooping during movement
- Device confirms your right size in real movement
Sit down during the test-drive — confirm the seat height lets feet flat on ground with no dangling
Grip the handles and walk 10 steps — confirm no shrugging or stooping occurs naturally
Test brakes on a slight slope — confirm the device stops immediately and holds position
Online Purchases — Extra Caution Required
When purchasing a rollator online, you cannot test-drive before buying. Always check the return policy before ordering, read confirmed user reviews from people of similar height, and verify the full needs checklist against the product specifications. If possible, try the same model in-store first before buying online.
What Is the Best Tall Walker for Seniors?
For any senior who is taller than average, standard frames simply do not offer adequate handles height. A dedicated tall walker ensures the user can move safely and comfortably without hunching or overreaching. The best options in this category offer handles reaching 41 inches or more, with some models extending 2 inches higher than a standard frame walker maximum.
The Heavy Duty Folding Walker is frequently recommended in this category, offering up to 39 inches of handle height in a sturdy, portable design. For rollator users in the tall size bracket, confirming both handle height and frame load capacity is essential — tall users often also require reinforced frames to ensure long-term structural reliability.
- Handle height up to 39 inches
- Sturdy reinforced frame construction
- Folds flat for easy transport and storage
- Standard frame walker — no wheels, maximum stability
- Suits users taller than average up to 6'4"
- Handles reaching 41 inches or more
- Extended 2 inches higher than standard rollator max
- Reinforced frame for tall size users
- Includes brakes, seat, and fold mechanism
- Suits rollator users in the tall size bracket
Frequently Asked Questions
Medical Disclaimer: This calculator and all content on this page is based on clinician-approved formulas used by physical therapists and occupational therapists worldwide. Results are a starting point — not a substitute for professional evaluation. If you have balance concerns, post-surgery limitations, or complex mobility needs, always consult a qualified rehabilitation therapist before finalizing your walker height settings. Individual results may vary based on arm length, posture, walking style, and specific mobility conditions.
Affiliate Disclosure: Some links on this page are affiliate links. As an affiliate, I may earn a commission if you purchase a product through one of these links — at absolutely no additional cost to you. All product recommendations are based on genuine research and relevance to the topic. Commissions help keep this content free and regularly updated for readers.
More Walker Guides for Seniors